Browser Automation with CaptchaSonic
Integrating CaptchaSonic into your browser automation workflows allows you to bypass complex CAPTCHA challenges without manual intervention. This guide covers the installation, configuration, and usage of the CaptchaSonic extension in automated environments.
TIP
Preferred Method: For high-scale automation, we recommend using our API directly. However, the browser extension is ideal for tools like Selenium, Puppeteer, and Playwright where a real browser environment is required.
1. Getting Started
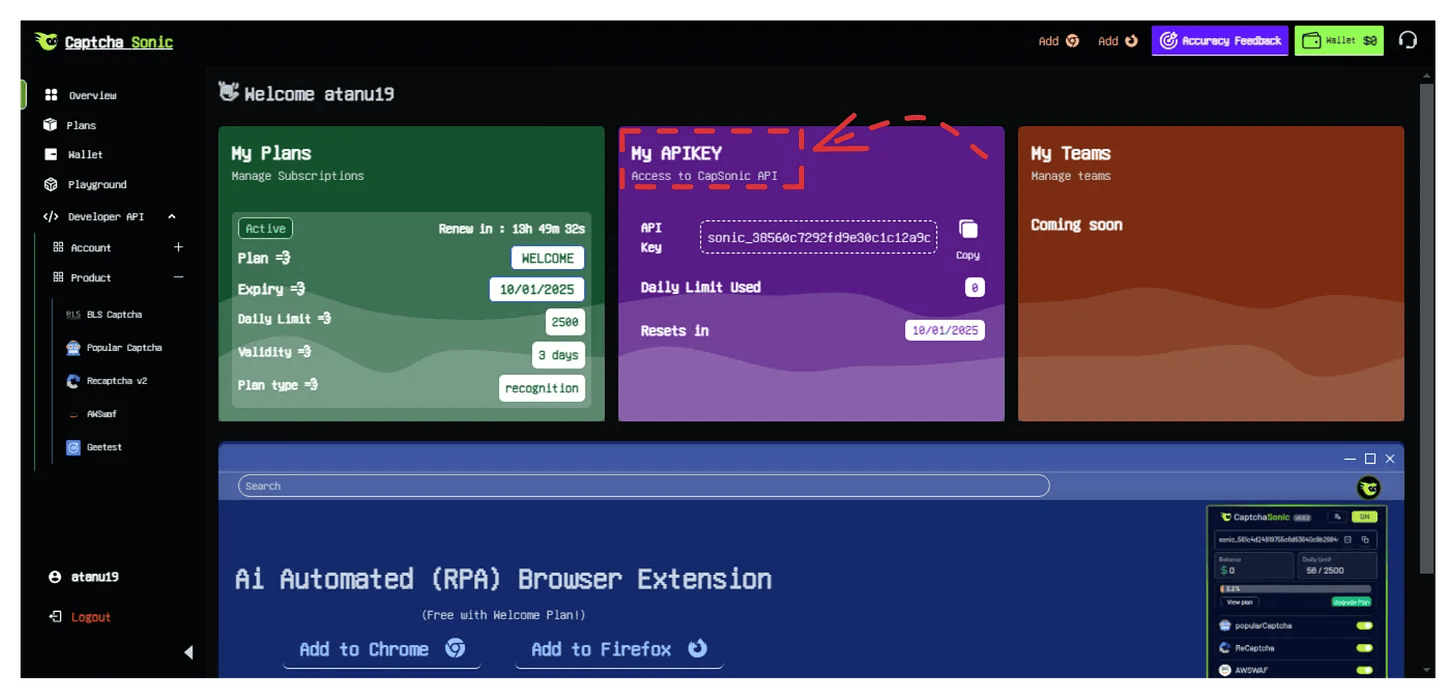
Before you can use the extension in your automation scripts, you need a valid API key from your CaptchaSonic dashboard.
- Account Creation: Register at captchasonic.com.
- Obtain API Key: Log in to your Dashboard and copy your unique API key.
2. Installation & Setup
For Chrome/Chromium Based Browsers
Automation frameworks often require a "hard-coded" API key if you aren't using a persistent browser profile.
- Download Source: Clone or download the CaptchaSonic Extension Repository.
- Configure API Key:
- Navigate to the
configfolder within the extension source. - Open the default configuration file (usually
config.jsonor similar). - Paste your API key into the
apiKeyfield.
- Navigate to the
- Loading in Chrome:
- Open
chrome://extensions/. - Enable Developer Mode.
- Click Load unpacked and select the modified extension folder.
- Open
IMPORTANT
Ensure your automation framework is configured to allow loading unpacked extensions. In Selenium, this is done via ChromeOptions.
For Firefox
- Download XPI: Install from the Firefox Add-ons store, or grab the latest build from the CaptchaSonic Extension Releases.
- Manual Install: Navigate to
about:addons, click the gear icon, and select Install Add-on From File.
3. Automation Framework Integration
To use the extension in your code, you must specify the path to the extension folder or file.
Selenium (Python)
from selenium import webdriver
from selenium.webdriver.chrome.options import Options

chrome_options = Options()
chrome_options.add_argument("--load-extension=/path/to/extracted/extension")

driver = webdriver.Chrome(options=chrome_options)
driver.get("https://web.captcha-target.com")
Playwright (Node.js)
const { chromium } = require('playwright');

(async () => {
  const pathToExtension = require('path').join(__dirname, 'my-extension');
  const userDataDir = '/tmp/test-user-data-dir';
  const browserContext = await chromium.launchPersistentContext(userDataDir, {
    headless: false,
    args: [
      `--disable-extensions-except=${pathToExtension}`,
      `--load-extension=${pathToExtension}`,
    ],
  });
  // ... your automation logic
})();
4. Configuring Parameters
Inside the extension popup or configuration file, you can fine-tune how CAPTCHAs are handled:
- Auto-Solve: Automatically triggers the solving process when a CAPTCHA is detected.
- Solve Delay: Adds a natural delay before solving to mimic human behavior.
- Target Types: Enable/Disable specific solvers for reCAPTCHA, hCaptcha, GeeTest, etc.
5. Deployment Considerations
- Headless Mode: Standard extensions do not run in "True Headless" mode (
--headless=new). Use--headless=oldor a virtual framebuffer (Xvfb) on Linux servers. - Proxy Support: Most extensions respect the browser's system proxy settings configured via your automation framework.
6. Conclusion
By integrating the CaptchaSonic extension, you significantly reduce the complexity of handling interactive challenges in your browser automation tasks.
For further technical support or custom integration requests, contact our team via the Dashboard.